Monthly Archives: April 2013

Antique Accordian Album

Antique Accordion Album


The aim of this project was to put all my old family photos and information and family tree into a form that is appealing to look at and feels old and antique to match the old photos. Now it is like a family Ò€œstory bookÒ€ and also an heirloom for the family to pass down through the generations. The materials used are as follows:-
1x Ò€œ7GypsiesÒ€ Stacked Accordion Journal
1x packet Kaisercraft Tiny Alpha stickers
Assorted scrap booking papers
Assorted Kaisercraft mini ink pads
Ranger Distress ink
Glossy Accents medium for adhesive
Prima Flowers and miniature doilies
Self adhesive jewels
Antique look Keyhole
Metal corner pieces for cover
Chipboard word- Family
Mod Podge Matt sealer/adhesive
Ranger Ink applicator pad / tool
Gold and bronze paint
Copies of old photos
Family tree typed or hand printed
Old buttons /Old postage stamps
Fabric for back cover
Ribbon/lace/Strips of calico
Thin wadding (padding)
Embossed cardstock
Leather strap/ tie
  • This is how I put it all together. I started with the front cover and coloured the embossed cardstock for the front cover. I coloured it with the mini Kaisercraft ink pads using the ink applicator pad to spread the colour. I placed a small square of wadding (padding) under the embossed paper to give it more dimension.
  • I then coloured the 2cm calico strips of fabric with Antique linen distress ink and glued them down with Mod Podge on the edges of the embossed paper. I added the metal details Γ’β‚¬β€œ the keyhole and metal corner pieces. I then used ribbon across the top at an angle and glued word Γ’β‚¬ΛœFamilyÒ€ℒ on top. I added a flower and crocheted doily aged with ink to the corner.
  • Next was the back cover using brown fabric instead of embossed cardstock, but using the same principle of padding underneath and calico strip edges. But the only embellishment was a large brad for securing the leather tie, this was added last.
  • Next was preparing all the pages with some subtle inked colours. I used Ò€œSandstoneÒ€ and Ò€œFairy flossÒ€ blended. I distressed the page edges with Ò€œAntique linenÒ€. I then worked out my layout of photos, and chose the back ground papers to compliment the photos. I used lace, flowers and jewels and pearls for feminine decoration and gold painted chip board frames, old buttons and old postage stamps for the masculine look. I used the Tiny Alpha letters for the names under the photo.
  • I typed up the little stories about the family members and put them on journal tags or as folded accordion style inside a pocket. The family tree was inked to Ò€œageÒ€ the paper and glued onto one of the inserts in the album. I attached the front and back pages to the album covers.
Roz Kelly, Kalbarri, WA

Easy Peasy Colourful Backgrounds

Easy Peasy Colourful Backgrounds, Using Dye Based Inkpads
by Lorri Lennox

You will need:  

Dye based inkpads – Various colours.  (Tim Holtz Distress ink pads work great for this technique)
Background ATC bases, preferably white coloured.
Non-stick craft mat. (or using a 12×12 inch plastic bag will work for this too!)
Water spray mister bottle (filled with water)
Baby wipes for clean up.

Instructions:

Begin by choosing 3 colours of inkpads that you want for your background.
Clean your non-stick craft mat prior to working.
Take the first inkpad of the lightest colour and dab it two or three times, onto your non-stick craft mat keeping the ink within an area of about 5inches. (I will usually ink up the left corner, the centre and the bottom right corner within the area)
Take the second next lightest colour inkpad and again dab it onto your non-stick craft mat, (I will now ink up the top right corner, and bottom left corners)  trying to avoid  the previous coloured ink patches, in order to avoid cross colour ink contamination (I admit, IÒ€ℒm not terribly fussy about doing this, as I will remove any ink contamination with my baby wipes until the normal inkpad colour is returned)
Take the third darkest colour inkpad and fill in any gaps (I will usually dab this pad 4 times.. Once in the top centre, in between the top corners, centre left side, centre right side, and in between the bottom corners)
Now take your spritz bottle and generously spray all over the ink, you will see the inks beginning to run together.
Take your ATC base card, or Cardstock for cardmaking etc Γ’β‚¬β€œ and press it down firmly onto the inky patch, then lift it straight up, and set it aside to dry.
Do not move it around, or it can smear and look murky Γ’β‚¬β€œ but experiment as sometimes this can be the look you want to create.
Soak up any excess ink with another ATC Base.
Clean your non-stick craft mat with your baby wipes.
TIP: I will often press a blank journal page down onto the ink, as a starter for a journal page.

HereÒ€ℒs some ATC Bases I inked up after adhering torn paper strips to the base cards, and some torn paper strips were inked up separately and then adhered to the cards.

 HereÒ€ℒs some more ATCÒ€ℒs using the inked up technique as a background, this time I used only two coloured inkpads J

I hope you enjoyed my quick and easy tutorial, for more inspiration please visit me:

What is Washi Tape?

Welcome to our What is Wednesday!

We endeavour to post a new what is every week. But we need your help! Let us know what you would like to know more about ….

This week we are going to give you a brief history of Washi Tape and its many uses.

Basically Washi Tape originally comes from Japan and is made from rice paper. It is now manufactured in any different colours and patterns. 

Here is the description from wikipedia:

Washi (Γ₯’Œç´ℒ?) is a style of paper that was first made in Japan. Washi is commonly made using fibers from the bark of the gampi tree, the mitsumata shrub (Edgeworthia chrysantha), or thepaper mulberry, but also can be made using bamboohemprice, and wheatWashi comes from wa meaning Japanese and shi meaning paper, and the term is used to describe paper made by hand in the traditional manner.[1]
Washi is generally tougher than ordinary paper made from wood pulp, and is used in many traditional arts. OrigamiShodo, and Ukiyo-e were all produced using washi. Washi was also used to make various everyday goods like clothes, household goods, and toys as well as vestments and ritual objects for Shinto priests and statues of Buddha. It was even used to makewreaths that were given to winners in the 1998 Winter Paralympics. Several kinds of washi, referred to collectively as Japanese tissue, are used in the conservation and mending of books. Washi has also found a new form, as a tape, usually combined with acrylic glue. It is similar to masking tape in that it is removable from most surfaces.
So, what do we use it for?
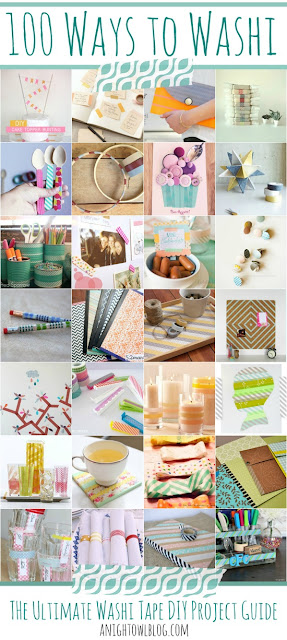
As well as using washi tape on layouts, creating borders and bits of interest on your page there is plenty more inspiration to be found on Pinterest! Here are some images from there: (original websites are watermarked on the photos πŸ™‚ )


We have a large variety of washi tape available in store and over 50 designs in our webstore. {here

Dyan Reaveley – Art Journal Cover

Good Morning everyone!

Please welcome Roz and her blog post πŸ™‚


Textured Cover for Art Journal
Materials…..
  • Dyan Reaveley art journal 30x23cm
  • a magazine cut out of a pretty face
  • scrap booking papers
  • Glossy Mod Podge
  • Glossy Accents
  • Texture paste
  • Donna Downey chrysanthemum 6×6 stencil
  • ribbon and yarn- for tassels
  • diamante self adhesive jewels for her earrings,
  • buttons and lace,
  • the tissue tape to bind the edges,
  • the black Pilot Permaball pen to highlight the eyeliner and eyelashes
  • acrylic paints
  • a key and chain trinket
  • Matt Spray finishing sealer (available in store – not online)
  • Dyan Reaveley Dylusions ink sprays
Method-  I have torn up and pasted pieces of scrap booking papers onto the journal cover as a base. I used matt Mod podge as the adhesive both on the cover before sticking the paper and also some on the back of the paper. I found a picture of a pretty face in a magazine and pasted the face in the upper left corner. I fussy cut some flowers from the papers of some roses and pasted it in the top left corner to frame the face. I coloured some lace with Dylusions ink sprays to co-ordinate with the cover colours. I made a rosette for the ladyÒ€ℒs hair, and glued with a black felt flower and diamante. I also glued diamante below her right ear for earrings. When the Mod Podge was dry I used the Pilot Permaball to highlight the eyes and eyelashes.


I used texture paste tinted pale orange with acrylic paint, and thickly spread it over the flower stencil with a spatula, lifting up to reveal a textured flower design about where the dress would be. I also used the texture paste coloured scarlet to carefully fill in the lips. When dry (12hrs later) I applied Glossy accents Γ’β‚¬β€œ so the lips have a 3D effect!  
I used letter cut outs and words for the title and year 2013. I used more coloured lace on the right edge border and a row of buttons glued with glossy accents across the bottom of the cover. I randomly stamped sayings and writing about the page for interest. I added a flower paperclip with a chain and key. I glued the paperclip only, leaving the key to dangle.
I edged the cover with washi tape (tissue tape) and with a brad attached a selection of textured wool strands and ribbon to the spine of the journal to use as page markers.
I used matt Mod Podge to coat the whole cover as a sealer. Leaving overnight to dry between coats (or use a dryer to speed the process). I used 3 coats of Mod Podge.
Handy Hint:-  There is usually a slight tackiness even when the Mod Podge is dry, to overcome this, spray finally with a coat of Matt Spray finishing sealer (use outdoors and avoid breathing the vapour) and leave outside to dry overnight. Happy art journaling!
By Rosalyn Kelly 


Thank you Roz πŸ™‚

We have another post by Roz which will be posted early next week.

All items (except for magazine cut out) is available in store. πŸ™‚


New Page Kit – Prima Divine

Hello!

Who has scrapbooking on the menu this weekend? Not feeling very inspired but would like to create? How about one of our page kits?

We have a variety of layout and card kits available in store. Have a look at our new one:

Kit includes 5 1/2 papers, plenty of flowers, butterflies and Lace.

These kits are in very limited supply πŸ™‚ Kit can be purchased {here}

Basic Grey Bi-Monthly Scrap Kits

Good Evening!

Do you subscribe to the Basic Grey scrap kits? do you make them exactly as they are?

They don’t always suit me so I usually create something totally different. On Sunday afternoon I finally got a chance to sit down with the kit from March / April.

The kit came with plenty of papers, alphabet stickers, dimensional stickers + more.

Here is the layout created by the Basic Grey Design team. Full instructions are included for this.

First I created a single page layout:

There where plenty of left overs, and after being inspired by something I saw on Pinterest I created a folder to store cards and envelopes. I often give handmade cards as gifts, so being able to gift them in a folder seemed like a great idea! 
I didn’t measure – just made it as I went. Luckily it did end up fitting the cards and envelopes πŸ™‚

At Wednesdays class the ladies loved this idea so much that there will be a class on it soon on a Saturday afternoon and Wednesday morning.

The other kit featured the Bowties Collection.

I LOVED the green papers in the collection and thought it was such a great shame they weren’t featured so I created the following 3 layouts. One of them still needs a title but I didn’t have the cricut machine at home πŸ™‚
I still have 2 of each kit left in the shop, let me know if you would like it πŸ™‚
Wishing everyone a fabulous week!